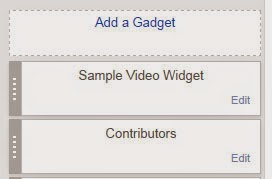
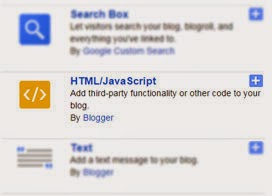
In composing a blog especially Blogger/Blogspot, of course we will always use Widgets to provide information with a wide variety of forms in accordance with the expected goal and purpose.
In a blog we certainly want a dynamic blog and look very good to read, so that will make readers comfortable and will certainly improve our blog traffic.
One thing that will usually become a problem that we have to do, namely: set up a widget that we created are displayed only under certain conditions only. In this article will be explained fully how to do that.
1. Create a widget in your blog
Steps to create the widget do in the following ways:
- Go to the blog you are going to edit by selecting the Dashboard Menu Layout.
- Clik the button Add Gadgets, and then choose the type of widget or gadget that you want.
- Please enter an existing selection list as you want, and then press the Save button.
2. Edit the blog manually (Edit HTML)
Next to be able to arrange for Widget or Gadget is displayed or hidden with certain conditions, then you have to edit it manually.
- Select a Template on the Dashboard Menu to edit a blog.
- Press Edit HTML button.
- After showing up like the picture below, we can manually edit the HTML code according to which we are referring.
3. How to show or hide a widget
To show and hide the Widget/Gadget in this article, we will use the statement "
b:if" with conditions in accordance with the needs of the type of blog page what we will use.
The most effective way at this time we are going to edit the code to display and hide the widget is in a way:
- Remember and specify the name of the widget which we will be edited.
- Do a search in the edit HTML button, by pressing Ctrl + F.
- Further give conditions to regulate, whether to be shown or hidden.
In the following example we use in this case is the gadget "
Popular Posts"; After we search in the edit HTML, feed will show up like this:
<b:widget id='PopularPosts1' locked='false' title='Popular Posts' type='PopularPosts'>
  <b:includable id='main'>
   <b:if cond='data:title'><h2><data:title/></h2></b:if>
   <div class='widget-content popular-posts'>
     ...
     <b:include name='quickedit'/>
   </div>
  </b:includable>
</b:widget>
These are conditions that are given to hide or show the widget.
Just Shown in homepage
<b:widget id='PopularPosts1' locked='false' title='Popular Posts' type='PopularPosts'>
  <b:includable id='main'>
  <b:if cond='data:blog.url == data:blog.homepageUrl'>
   <b:if cond='data:title'><h2><data:title/></h2></b:if>
   <div class='widget-content popular-posts'>
     ...
     <b:include name='quickedit'/>
   </div>
  </b:if>
  </b:includable>
</b:widget>
Just Shown in post page
<b:widget id='PopularPosts1' locked='false' title='Popular Posts' type='PopularPosts'>
  <b:includable id='main'>
  <b:if cond='data:blog.url == "item"'>
   <b:if cond='data:title'><h2><data:title/></h2></b:if>
   <div class='widget-content popular-posts'>
     ...
     <b:include name='quickedit'/>
   </div>
  </b:includable>
  </b:if>
</b:widget>
Just Shown in archive page
<b:widget id='PopularPosts1' locked='false' title='Popular Posts' type='PopularPosts'>
  <b:includable id='main'>
  <b:if cond='data:blog.url == "archive"'>
   <b:if cond='data:title'><h2><data:title/></h2></b:if>
   <div class='widget-content popular-posts'>
     ...
     <b:include name='quickedit'/>
   </div>
  </b:includable>
  </b:if>
</b:widget>
Just Shown show in static page
<b:widget id='PopularPosts1' locked='false' title='Popular Posts' type='PopularPosts'>
  <b:includable id='main'>
  <b:if cond='data:blog.url == "static_page"'>
   <b:if cond='data:title'><h2><data:title/></h2></b:if>
   <div class='widget-content popular-posts'>
     ...
     <b:include name='quickedit'/>
   </div>
  </b:includable>
  </b:if>
</b:widget>
Just Shown in specific page url
<b:widget id='PopularPosts1' locked='false' title='Popular Posts' type='PopularPosts'>
  <b:includable id='main'>
  <b:if cond='data:blog.url == "URL of the page"'>
   <b:if cond='data:title'><h2><data:title/></h2></b:if>
   <div class='widget-content popular-posts'>
     ...
     <b:include name='quickedit'/>
   </div>
  </b:includable>
  </b:if>
</b:widget>
Hidden from homepage
<b:widget id='PopularPosts1' locked='false' title='Popular Posts' type='PopularPosts'>
  <b:includable id='main'>
  <b:if cond='data:blog.url != data:blog.homepageUrl'>
   <b:if cond='data:title'><h2><data:title/></h2></b:if>
   <div class='widget-content popular-posts'>
     ...
     <b:include name='quickedit'/>
   </div>
  </b:includable>
  </b:if>
</b:widget>
Hidden from post page
<b:widget id='PopularPosts1' locked='false' title='Popular Posts' type='PopularPosts'>
  <b:includable id='main'>
  <b:if cond='data:blog.url != "item"'>
   <b:if cond='data:title'><h2><data:title/></h2></b:if>
   <div class='widget-content popular-posts'>
     ...
     <b:include name='quickedit'/>
   </div>
  </b:includable>
  </b:if>
</b:widget>
Hidden from archive page
<b:widget id='PopularPosts1' locked='false' title='Popular Posts' type='PopularPosts'>
  <b:includable id='main'>
  <b:if cond='data:blog.url != "archive"'>
   <b:if cond='data:title'><h2><data:title/></h2></b:if>
   <div class='widget-content popular-posts'>
     ...
     <b:include name='quickedit'/>
   </div>
  </b:includable>
  </b:if>
</b:widget>
Hidden from static page
<b:widget id='PopularPosts1' locked='false' title='Popular Posts' type='PopularPosts'>
  <b:includable id='main'>
  <b:if cond='data:blog.url != "static_page"'>
   <b:if cond='data:title'><h2><data:title/></h2></b:if>
   <div class='widget-content popular-posts'>
     ...
     <b:include name='quickedit'/>
   </div>
  </b:includable>
  </b:if>
</b:widget>
Hidden from specific page url
<b:widget id='PopularPosts1' locked='false' title='Popular Posts' type='PopularPosts'>
  <b:includable id='main'>
  <b:if cond='data:blog.url != "URL of the page"'>
   <b:if cond='data:title'><h2><data:title/></h2></b:if>
   <div class='widget-content popular-posts'>
     ...
     <b:include name='quickedit'/>
   </div>
  </b:includable>
  </b:if>
</b:widget>
I hope this article was useful to you. Get our other articles on our blog
www.senatechno.com.


